Wednesday, April 29, 2009
Sprinkles in Circles?
I figure that you will either love it, or hate it. Hopefully you will love it. I was in the mood for circles and bright colors. So every color used here is from Stampin Up's Bold Brights color group.
First I stamped two of the stamps with some Bold Brights ink onto Whisper White card stock., then I punched parts of them out with circle punches. Punch size and shapes do not matter, I happened to choose circles. Then I adhered them off center to plain colored card stock. The next thing that I did was to place them randomly on the right side of my Green Galore card base. I purposely put some over the edge of the card base, then cut them off using the card base as a guide. I then decided to add the cut pieces to the card, why waste them? Then I stamped the sentiment by coloring the stamp with SU Brilliant Blue marker one word at a time, so that I could space them apart. Remember if you do this, clean the stamp after stamping each word.
I almost left it at that, but I was in the mood to color, so I did. That about sums it up. I will list the colors used below just in case anyone viewing is new to Stampin Up's colors.
Colors Used:
Brilliant Blue, Tempting Turquoise, Pink Passion, Lovely Lilac, Green Galore.
Blessings, Lisa
Tuesday, April 28, 2009
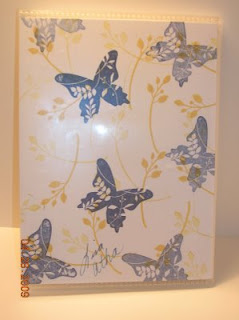
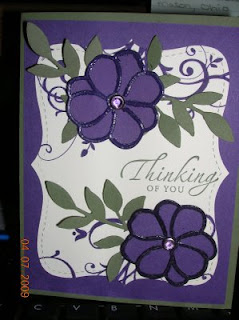
Altered Photo Brag Book
Here is a close-up photo of one of the butterflies from the front cover:
Last, but not least, I have to show you a photo of the gorgeous covers in all of the albums. I will be creating something with them in the near future with the Faux Cloisonne` technique.
Before I go, Please keep reading.......this is very important!!!!!!! I am sure you have heard me mention a friend of mine (who also has a blog - Understand Blue); Lydia Fiedler. Well, she is a huge animal lover like myself. She had the awesome opportunity to design a cat stamp for a charity. She has a link on her blog to where you can go to order one, and tell you about the charity. The link is on her side bar with the words "Buy a Stamp, Help a Cat". So, first click on her blog link above in the parenthesis, then click on her side bar link, then buy her too cute black kitty stamp. DO IT! NOW! Yes, I am being pushy, go with it!
I can't wait until I get mine in the mail, and I will be sure to post at least one creation with it! Lydia, has said that she will be posting creations made with it as well, as soon as her stamp arrives too. Ok, I am done. I am off to browse my favorite blogs and then go to bed. Have a great Wednesday!
Blessings, Lisa
Monday, April 27, 2009
Back to the Basics
Ok, the first thing that I did, was to load my wheel handle with my Pretty in Pink ink, and the wheel that coordinates with this stamp set, and ran it straight up the right side of the Pretty in Pink card stock. It may be kind of hard to see in the photo. Sorry. Next, I tore the card stock a wee bit on the front side of the card base, scored and folded the torn side back to reveal the wheeled edge, and used adhesive to hold it back of course. The the image was stamped in Basic Black ink on Whisper White card stock, and colored with pastels (chalks). Then it was cut into a square, mounted onto Mellow Moss card stock, and adhered to the card base. Finally, the sentiment is stamped in Basic Black ink. Was that simple or what?
I used this card to show you not only because I have been short on stamping time the past few days, but also to remind you to resurrect those old stamp sets that are retired and that you love so much. You spent your hard earned money on them, you should use them? Get out some older accessories that you haven't used in a long time too, you will have fun!
Until next time............. Blessings, Lisa
Friday, April 24, 2009
Sparkling Flowers
I saw something similar to this over on Splitcoaststampers website, but I can't remember the creator, so I am sorry I can't show you where my inspiration came from. The one that inspired me was cut from vellum card stock, just like mine is here, but did not have any glitter added. I know I love this embossing folder and I hope SU gets together with Sizzix and adds more of them to our catalog.
Anyhoo, after running this through my Cuttlebug machine, I cut off the excess at the top around the design, and went over the embossed areas with my Stampin Up two-way glue pen, then just sprinkled on the glitter and shook off the excess. It's messy, but fun! I adhered the vellum piece with some vellum adhesive so that the adhesive would not be seen through the vellum. The sentiment is from SU's "Sincere Salutations" stamp set and I stamped it in SU Brilliant Blue. I finished it off with a bow from some white organdy ribbon from my stash.
I hope it brought a bright spot to your day! Until next time...Blessings, Lisa
Wednesday, April 22, 2009
Hiding Butterflies
The stamps that I used are from a Hero Arts Wood mounted set called Patterned Butterflies. I stamped the butterflies on the inside, knowing that the full butterfly would not be seen from the front of the card, then when you open it up, the second page looks like the following photo:
Then, so that the card could be used to write on, I added a third page with Stampin Up's Whisper White Card stock, which can be seen in this photo:
The colors of ink that were used to stamp this card were the following:
Stampin Up ~ Ballet Blue, Real Red, Brilliant Blue, Only Orange, Lovely Lilac, Yoyo Yellow, Tempting Turquoise, Green Galore, Pink Passion. The two flower embellishments on the front are from Prima.
I hope it brightens your day. Until next time...Blessings, Lisa
Tuesday, April 21, 2009
Here it is...........
So, here is the card:
I love this bunny, he reminds me of Thumper from the Disney cartoon "Bambi". They should have added a little skunk to this set, so we could have had a "Flower " look-a-like. Don't you think so?
The card stock colors that I used on this were Stampin Up's Pretty in Pink, Regal Rose, and Rose Red.
Ok, sleepiness hit me already, my poor eyeballs are feeling the pain. Goodnight. Lisa
P.S. If there are any typing or spelling errors, then it's the kitty's fault!
Monday, April 20, 2009
Forest Friends and the Word Window Punch
The card base is SU Kraft card stock, the monochromatic purples are Almost amethyst, Lavender Lace, and Lovely Lilac. The sentiment is from the Trendy Trees Stamp Set, the scalloped circle is Very Vanilla card stock. I used my SU Lovely Lilac marker to make the dots in the scallops and above and below the word window shapes. Yes, I used a straight edge to keep the word window shapes in a straight line across the card. I stamped, cut out, and popped up the deer with some foam dimensionals. Watch those skinny legs of his if you cut him out, it is easy to cut or tear them off accidentally. The last thing is that the three purple rhinestones are from Hero Arts. I also made on in Blue monochromatic colors, which you can see in the following picture:
After I got the Blue Word Window Shapes onto the card base, it made me think of a dear friend of mine, Lydia Fiedler. Her favorite color is blue, and she likes owls. Me likey Seahorses, she likeys owls. So, I stamped the owl from the Forest Friends stamp set. He need to see some ink anyways. I am thinking that the bunny from this stamp set might look good on pinks. I may add that one later. Yep, a basic gray bunny , on Monochromatic pinks!
Anyways, onto the colors used: Bashful Blue, Ballet Blue, and Brilliant Blue. Everything else is the same, except the blue rhinestones are from Michael's on this card. Tune back in later today, I might have a couple more of these posted.
Oh, speaking of my friend Lydia, pop on over to her blog today because she has made and posted the cutest birds made from Paper punches, and I think one of the new die-cut scallop circles from Stampin Up. Anyways, they are too cute, go see them! Oh, another link.....I heard Jennifer McGuire is on the Hero Arts Blog all of this week, and she is so creative. So, pop on over there and see what she has made to show us all, I am sure it will be some too cute eye candy. I put a link to her blog as well, awesome card ideas over there. Am I just full of links today or what? What can I say, its Monday so my daughter is at school, my husband is at work, and I am all alone to stamp and create! Gotta love that. Ok, off to do a few chores and eat lunch, so I can get back to stamping. Whew Who! Have a great day. Blessings, Lisa
Thursday, April 16, 2009
I don't know what to say
Blessings to all, Lisa
Wednesday, April 15, 2009
Big Shot Scallop Envelope Basket
I have to thank my upline, Lila for the design of the basket. Thanks again Lila! If you click on the photo and zoom in, you will notice that the basket is held together by the side flaps of the envelope shape. We used our sticky strip on each of these. The basket handle is held on with a couple of silver brads, and to keep the handle stationary, I also put a small piece of sticky strip under each brad. The cute little embellishment on the front was made with the SAB stamp set called Polka Dot Punches, a circle punch, a scallop circle punch, and a blue Rhinestone Brad. A strip of Designer paper (also from SAB) was cut, wrapped around the basket and adhered again with my sticky strip. Now, the bottom of the basket was a bit unstable, so I used sticky strip yet again to keep the flaps from moving. See the next photo below:
A square piece of card stock added to the bottom inside of the basket would also help make it stronger as well. That about sums it up. I used mine for an Easter decor, with little chicks and eggs in it. I am picturing it looking real cute setting out at a bridal or baby shower as a decoration or treat holder as well. Just change the colors and designer paper to fit your theme.
I have a couple more photos to show below of the sides of the basket. If you have any questions, drop me an email or comment. Blessings, Lisa
Saturday, April 11, 2009
Circle Scissor from Stampin Up
Now, I know you are saying that the circle looks wider on one side than the other and you are correct, but remember this is my first time using the tool. I think that considering that, I did pretty good. Oh, I must give credit for the card design, which goes to my upline Lila. Thanks a bunch Lila! All supplies used are Stampin Up products. The card base is Kiwi Kiss., the stamped images are mounted on Chocolate Chip, the button in the right hand corner is one of the new Corduroy Brads. I am loving those new brads, they are too cute and can be layered on top of the coordinating buttons that come with them. I plan to get some and mix and match the colors, very awesome! Ok, the stamp set is Garden Whimsey. The ink colors are Tangerine Tango, Kiwi Kiss, Pacific Point, and Chocolate Chip. Oh, and the circle is made from Pacific Point Blue card stock. I wish I could give you a tutorial on the circle scissor, but at the moment I don't personally own one. If I get enough comments to make a photo tutorial (I don't have a video camera), then I will see if I can borrow one from someone. So, if you want the tutorial, leave a comment. I should say, that an in person demonstration is more helpful, but if you want me to blog it, I will blog it. Everyone have a very wonderful Easter. God Bless, Lisa
Wednesday, April 8, 2009
More fun with the SU Big Shot!
The colors that we used were Stampin Up's Baha Breeze (gorgeous), Whisper White, Chocolate Chip. We also used as you can see the coordinating stamp set, Manhattan Flower, and embellished the card with 5/8" Chocolate Chip Grosgrain Ribbon, a filigree brad/brown flower combo from the flower assortment brads.
The Textured Impressions die looks exactly like and is used exactly like a cuttlebug embossing folder. So easy to use, and look at the awesome result! Give me a call and order one!
Blessings, Lisa
Tuesday, April 7, 2009
Big Shot / Stamping on Card
Just in case you haven't seen any of the embosslits that SU has to use in their Sizzix Big Shot machine, the flowers on the card were made from one of them. The leaves, were made from the little leaves sizzlets die-cut, and the vanilla piece is the Top Note Bigz die-cut. The darker areas of the flowers are the embossed areas, and I took them a step further when I got home and colored them with the fine point end of my Versamarker, and heat embossed them with some SU clear embossing powder. They looked great without the heat embossing, I am just obsessed with heat embossing right now. The swirls stamped on the vanilla piece are from SU Baroque Motifs stamp set, and the sentiment is from Sincere Salutations Stamp set. The card base and leaves are Always Artichoke, and Elegant Eggplant on top of that. The flower centers are Stampin Up's Rhinestone Brads, the flowers, and leaves were attached with SU Stampin Dimensionals. I think that about covers it. As always, feel free to contact me or leave a comment if you have any questions. Come back again this week, as I have 3 other projects from this fabulous workshop to show you. Two of the the projects involve the Big Shot, and the last one utilized the new Circle Scissor that Stampin Up sells now. Oh, and thanks again to my upline, Lila, for these great project ideas, and for letting us play with your new tools! We all had a great time crafting at your house!
Blessings, Lisa
Monday, April 6, 2009
An Old Stampin Up Favorite
First I started out stamping these two images on watercolor paper, because I was in the mood to color. I had no idea what I was going to do with them afterwards. So, they sat on my table for oh.........2 weeks. Tell me this happens to you viewers as well! I colored, matted......and then went completely blank! So, finally here it is finished. Yes, I am unsatisfied with it, I am my own worst critic. But then, aren't we all? I seemed to have lost my ability to keep things straight on this card! Yes, Lydia, (my friend from Understand Blue), I know I should purchase a stamp-a-majig, and read your article on this very thing in the March, 2009 issue of "Scrap & Stamp Arts" magazine. Yes, I am very proud of her, and not afraid to brag about the fact that she is my friend! Hi Lydia! Ok, on with the card........The card base is Regal Rose card stock, then Very vanilla is layered on top of that. The cute critters are mounted on Lavender Lace card stock, and the sentiment is stamped in Lavender Lace Classic Ink from Stampin Up. Now onto the contraband items. The ribbon is from KI Memories, the flowers are from Prima (where else), the cute little pearl centers on the flowers are from Michael's Craft store. I adhered the ribbon with Snail adhesive, and it is hard to tell, but the critters are popped up with some foam dimensionals. That about sums it up. Gotta run, my DH is patiently waiting to help me with something her in my wonderful craft room. Until next time, Blessings! Lisa
Wednesday, April 1, 2009
Bird on a Branch
I used the Top Note Die cut out of Whisper White card stock, Certainly Celery is the base of the card. The tree branch and sentiment were stamped with Close to Cocoa classic ink, the bird is Bashful Blue, the blossoms on the tree branch are Pretty in Pink, and I used my SU 2-way glue pen on the blossoms and added Dazzling Diamonds glitter. The top note shape edges were sponged with Pretty in Pink Classic ink. The three pink baubles are from Michael's, last year when they were on clearance in their floral section. That about sums it up. I am short and sweet tonight, literally. Tee hee. Actually, I am short (4'-10") everynight, just not always sweet. Tee hee, again.
Blessings, Lisa