Showing posts with label Clean and Simple Card. Show all posts

Monday, July 16, 2012

CAS Sketch

Wow, having fun again with another sketch from the Clean and Simple Blog. Those ladies are awesome!!! I made two cards, this one with a retired Stampin Up flower punch:
This one with a Creative Memories Butterfly Punch, and I changed the background card stock from Barely Banana to Daffodil Delight, yes, my favorite color combo of Purple and yellow. lol
Here is the sketch:
Just to give you some more ideas, something stamped inside one inch punches of any shape, or use some of the Inkadinkadoo inchie stamps would work awesome too with this sketch, not to mention small chipboard shapes, di-cuts, etc............ So, go have fun with it and come back to visit me tomorrow for Soft Pencil Studios Day, we have a new digi image that we are showing you!!!! Until Next time.............Blessings, Lisa

Thursday, July 12, 2012

Clean and Simple Card

Hello, time for a little "Clean and Simple" card making. I found this sketch over at the Clean and Simple blog, love it over there!!! I am late with it as usual, they have a new sketch over there already. here is the card that I made:
Here is the sketch:
The flowers on the card are chipboard pieces that my friend Kerry gave me and I just heat embossed them to get the pretty colors on them. Until next time...........Blessings, Lisa

Monday, June 25, 2012

Asian Inspired Monday

Hey, Happy Monday to all of you!!! I often like to play with the card sketches on the Clean and Simple Blog, and I treated myself to a new stamp set last month when they were on sale at JoAnn's fabric and Craft Store called Asian Inspired. First the sketch: Here is the stamp set that I used: I used the little flower stamp from the set and made this card: The DSP is from DCWV Far East Mat pack. The ink is SU Baja Breeze and Bayou Blue, the CArd stock is SU Crumb Cake and Baja Breeze, and the button is from DCWV. Hope you like it. Come back and visit me tomorrow for Soft Pencil Tuesday!!! Blessings, Lisa

Sunday, November 13, 2011

Clean and Simple Cards

Well, I am really late posting this, the clean and simple blog is able to post their new sketches faster than I can craft with them, but I wanted to still show you this sketch and my samples because it is an awesome sketch with so many possibilities, from using stamps, to buttons, to flowers, to embellishments. Gotta love it! Ok, here is the sketch:


Now, here are all of the cards that I made with it:

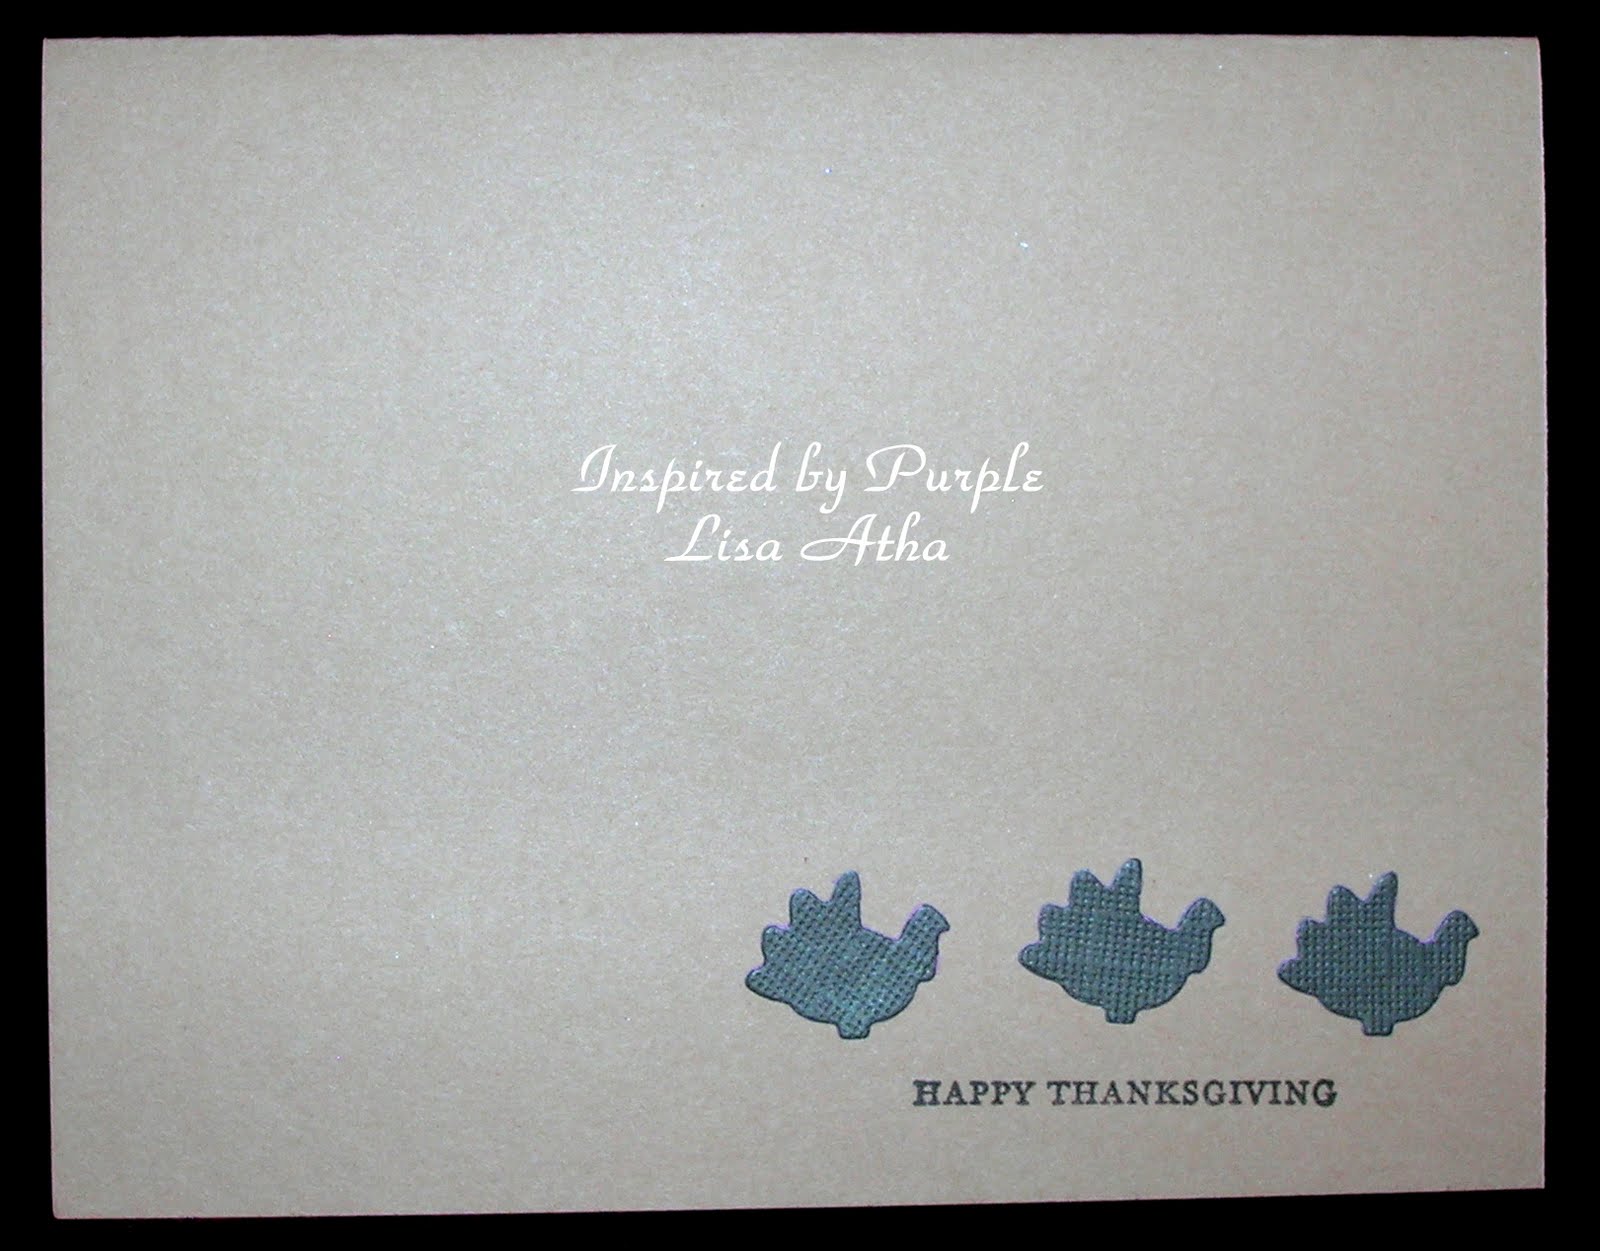
This one I used a Martha Stewart Punch


Martha Stewart punch again


Strange little di cuts that I have no idea who made. I run them through my Cuttlebug.


I love this little Turkey


Here is a picture of the di-cuts, if you know their brands, please leave me a comment and let me know. Greatly appreciated.


Oh, please excuse the colors on this photos, not at all good today. We all know by now that my photography skills are not the greatest.

Now, I am off to go visit the clean and simple blog and see how many sketches I am behind on. lol. You can find a link to their blog on my sidebar under my favorite blogs list.

Until next time.......... Blessings, Lisa

Saturday, July 9, 2011

Clean and Simple Card Challenge

Hello Welcome to the weekend! I was on a roll Friday evening playing around with this week's card sketch over on the Clean and Simple Blog (see my favorite blogs list on my sidebar for a link). So, I made 3 versions of the sketch. I love quick and simple cards!!!! Here is the sketch that they are posting:


Here are the Three cards that I made using the sketch:


Hope I inspired you to get crafting......

Until next time...........Blessings, Lisa

Friday, November 6, 2009

Of The Earth

is the stamp set that I used for today's post and it is from Stampin Up. I posted previously with the square bird stamp from that set which you can see here. Here are a couple of cards using the other two images and the sentiment from that set.


I had a negative oval image leftover from my blue bird card from 2 posts ago (scroll down to see it), and so I thought I would try something that I saw on Sandi MacIver's blog which you can find over on my favorite blogs list on the sidebar. I held down the negative oval, and sponged some ink all over inside it. Then, stamped my images in the center of the sponged oval with black ink. It is fun, easy, quick to do and looks very pretty. I hope you enjoyed it and take a look over on Sandi's blog, she is so creative.

Supplies Used: Ink ~ SU Crushed Curry, Regal Rose, Memento Tuxedo Black
Card stock ~ SU Whisper White

Until Next time............Blessings, Lisa


Wednesday, September 16, 2009

Halloween Cards

Hello. I have a couple of Halloween cards to share with you today! I decided that I would stick to only 3 colors.........Whisper White, Basic Black, and Going Gray from Stampin Up for those of you who are new to my blog.


The first card features the Bat stamp from Stampin Up's "Halloween Frights" stamp set, the second features a Hero Arts Ghost stamp. So, here is the first card:


You will have to excuse my photography on this one, as I was in a huge hurry tonight. The bat border punch is by EK Success, I got it on a clearance shelf at Michael's for quite a bargain. The sentiment is from Stampin Up's Teeny Tiny Wishes Stamp set. That is a great stamp set, there is a short and sweet sentiment for every occasion you need to make a card for. It is a definite "must have". I used a 1-1/4" regular square punch to punch out my stamped bats, and they are mounted on scalloped squares made with the SU scallop square punch. The little gray bats in the squares were leftovers from punching the border, and the rest of the little gray batty leftovers, are on the inside of the card as you can see on the photo below. I hate to waste anything, if I can avoid it.


Now the next card I used the same color scheme, but different tools, stamps and design. The large ghost in the upper right hand corner is a small Hero arts stamp that I found in the "Hot Spot" at Archiver's, is he cute or what? He is punched with a 1-1/4" square punch and mounted on the SU scallop square punch. The sentiment is punched out with the Stampin Up Word Window punch, and mounted on the Stampin Up Modern Label punch. The very cute graveyard border at the bottom is a Martha Stewart border punch, and the also adorable flying ghosts above the border are some tiny little die-cuts that I can't remember the name of. They work in my Cuttlebug or the Big Shot, that is all that I care about. I hope you enjoy them.


Until next time...........................Blessings, Lisa


Thursday, September 10, 2009

Charming Card

is what I have to show you today, because I used the new Stampin Up stamp set called "Charming" from the Holiday Mini catalog. I have been waiting for an idea to pop in my head using this stamp set, because it is so gorgeous. Last night I was browsing some blogs, and saw that someone (sorry I forget who) used the new Ornament punch to make a chubby flower vase. Sounds odd at first until you see it. So, here is my version of the chubby ornament punch vase thingy. instructions and photo to show you how will follow. First check out the finished card.
There is a tone-on-tone decoration (in Night of Navy) stamped on the vase that is hard to see in a photo, so the next photo shows it blown up and lightened so that it can be seen.
I love this set so much that i just had to take a photo of it to show you as well. Of course you can order one of these and many other things if you want. Info is on my sidebar.
Now, to show you how to make the chubby vase with the ornament punch. By the way, there is a stamp set that coordinates with the ornament punch in the holiday mini catalog. I will post a card or two using that stamp set soon. As you can see in the photo, you can simply line up the ornament punch at the edge of a piece of card stock or DSP, leaving out the point of the ornament, so that when you punch, you automatically get a straight edge for the vase bottom. Easy Peasy! If you have any questions, just leave a comment or contact me.


The flower stamp was colored with Stampin Up markers (Garden Green, Ballet Blue), stamped, then I added some Night of Navy highlights to the tips of the flowers and to the body of the butterfly. The sentiment is from Teeny Tiny Phrases stamp set by Stampin Up also. The card base is SU Very Vanilla, and that sums it up. Until next time......Blessings, Lisa


Tuesday, September 1, 2009

Clean and Simple Birds

Today I have a couple of Clean and Simple cards to share that I made with the Stampin Up Level One Hostess set called "Of the Earth". I chose to use the bird stamp from that set today.

The first card as you can see is purple. Imagine that! Purple on my blog, what else? Anyways, the card base is Stampin Up's Almost Amethyst, the image is stamped on Whisper White with Elegant Eggplant ink; and it is layered on Elegant Eggplant card stock. The image was cut out with my 1-1/4" square punch, and the mat was cut with my 1-3/8" square punch. The embossed square around the bird was made by running one of my Spellbinder's square nestibilities through my cuttlebug with a tan embossing mat, instead of cutting plates only. This was my first try with this, but not my last, I love the result.


This one was actually even easier than the first, as I simply stamped the image 3 times with each color,and punched then out with the 1-1/4" square punch and their mats with my Stampin Up Scallop Square punch. The colors used for this card are Stampin Up Bermuda Bay, Crushed Curry, and Whisper White for the card base. I hope you liked them.
Until next time.............................. Blessings, Lisa

Monday, August 31, 2009

Wild Things from The Greeting Farm

Hello. I hope all is well with all of you! I have been suffering from headaches from the lovely weather changes here in Ohio. However, I am still stamping. I have a couple of cards that I made with stamps from The Greeting Farm stamp company. Click on their name for a link to their store. You will also see a link to their blog on my sidebar. They have the most adorable stamp images/sets. They are definitely one of my favorite stamp companies. Ok, on with the cards:


The first card above is the lion image from their "Wild Things" stamp set. I was playing along with a challenge to make a circus themed card, and I though the Lion would be perfect. So there he sits on the podium roaring to the crowd. The podium was made with my Stampin Up Round Tab punch cut in half. The balloon bundle was made with the bunny and balloon stamp from TGF Lucky bunnies stamp set. I simply inked only the balloon three times, colored them and cut them out. The rectangle that the lion is on was cut with a Spellbinder's Large Rectangles Nestibility. The little popcorn embellishment was from A Sandilion Sticker Circus set from my stash, and the little stars were punched with a small star punch from Michael's with foil card stock .


I had a blast making this card too. I was looking at the monkey image that I had previously water colored, and the sentiment "swing at it" from the same "Wild Things" stamp set, and thought to myself that this monkey just had to be hanging from something. The vine that he is hanging on was cut with my SU Little Leaves die, and the other vines were made with my Creative Memories 12" curvy trimmer. I was going for a Clean and Simple Card on this one, so swinging monkey and his jungle vines were as far as I decide to take this. The leaves on the other vines were cut off of the die that the monkey is hanging on. The circle and its scallop layer are once again Spellbinder's Nestibilities.

Have a great Monday and until next time............... Blessings, Lisa

Monday, August 10, 2009

Chubby Owl

I found a cute chubby owl wood mounted stamp in a dollar bin at Michael's and could not resist. It is not very often that I find a cute stamp in the Michael's dollar bin. I decided to play around with a sketch on the clean and simple blog. Here is a picture of the sketch:


The rectangle is hand drawn, and is super easy, just find something with a very straight edge and go to it. Here is my version with my very reasonably priced chubby owl:


I traced over some parts of the owl with my Stampin Up Basic Black marker, and the owl and sentiment are stamped in Stampin Up's Close to Cocoa Classic ink. When I finished with the box, and owl, I decided that it needed some more color. Just brown and black seemed pretty dull to me, so I added some sticky blue gems from Michael's to the eyes and as accents near the box.

Clean and Simple, Easy Peasy. Now you try this sketch, a lot of different stamp images would work. A link to the Clean and Simple Blog is above and on the sidebar of my blog. They made several cards with this sketch and they are all adorable. Check them out and get stamping.

I went to a huge stamp convention Saturday and saw a lot of cool stuff and yes I purchased a few cool things. So, as soon as I organize my photos and thoughts, I will post about it.

Until next time........................Blessings, Lisa

Monday, July 27, 2009

Watercoloring with Stampin Up Supplies

Hello. Sorry I am so late posting today, since it is almost dark out here in good ole' Ohio. Better late than never. Lately, I have been really into Clean and Simple cards. I have no idea why, but it is what it is. Tonight is no exception. I took a stamp from one of my sets from The Greeting Farm stamp company and did some detailed water coloring, then cut the image out and placed it on a very simple card base. Water coloring is very therapeutic mentally, it relaxes me, and makes me smile. It really isn't hard once you get the hang of it, and use the right tools. Stampin Up happens to have some awesome coloring tools to work with. So first here is the card, then I will provide some instruction.


Feel free to double click on the photo to enlarge it and see the detail of the water coloring. I was frustrated with the way my water coloring looked, so I did some digging and found some instructions somewhere on the Internet. We are so fortunate to have so many paper crafters that blog and are nice enough to show us how to do things. I do apologize, but I can't remember where I saw and read about water coloring. I do invite you to visit the Website and blog link for The Greeting Farm stamp company, as the owner always has some beautiful samples posted on weekdays that her design team has made and they are excellent examples of awesome water coloring. Just click on the store name above, I attached a link to take you right to their store.

Anyways, I use a variety of Stampin Up products and tools when I am coloring a stamped image. I always make sure that I have the following on my table or nearby when I color: Stampin Up Classic Ink pads and refills, SU Watercolor Wonder Crayons, SU Blender Pens and Aqua Painters, Sponge Daubers, Watercolor Paper (cold-pressed 140lb), old wash cloth, and scrap paper of any kind.

What I have learned is to start out with a light color, and gradually color with the darker hues. For instance, if you look at my flower centers above you will notice that the centers appear lighter than the edges. Same thing with the flower petals and leaves. For instance, when I went to color the flower petals, I got out all of my Yellows, tested them in a row next to each other on my scrap paper to see which ones would look best together, then started coloring with the lightest of them, working my way outward to the darkest. I know it sounds intimidating, because it did to me at first. However, the more you practice, the easier it gets and the better your outlined images will look on your cards. I still don't think of myself as an expert on this, I just wanted to share with you, what I do know. I hope I have inspired you to give water coloring a try. The old wash cloth, is for when you get a little too much color or moisture on your blending pen or more specifically your Aqua painter. This brings me to a tip about Aqua painters, a little water, goes a long way. There is no need to fill them up all the way, because then you will have more water than color. Now if you are coloring a sky background that you want really soft looking, then more moisture can be good. The whole thing is a lot of trial and error. I hope however that I have provided you with a good starting point. If you have any questions feel free to email me (see my side bar) or leave a comment. Of course if you need any supplies or tools from Stampin Up, I can help you out there as well. Don't forget to check Stampin Up's web site, to see what their deal of the week is this week! Also, don't forget to click on over to The Greeting Farm's website and blog to see the great colored samples.

Until next time................................Blessings, Lisa

Tuesday, July 21, 2009

Summer Colors on Simple Cards

Hello. Sorry for my absence. Drop me an email and tell me how I can make it up to you. Please make sure it doesn't involve money, I am unemployed.


Anyways, here I am. I have been crafting, dealing with my very spoiled for attention kitty, nagging my 10 year old daughter to get into the shower (thank heavens I only have one). Finally, I got back to the computer to post something. Phew!


After browsing the Splitcoast Stampers Website, that I would play around with this weeks Clean And Simple Challenge, as I have before. I love those challenges, I love simple cards, I love quick cards. Heck, I love alot of things. Jennifer McGuire posts alot of Simple cards on her blog's card gallery, so does Jana Millen, and so does Lydia Fiedler of Understand Blue, all three of which are on my favorites blog list over on my side bar, or I added links to their names. Check them out. Not that we don't all enjoy a complicated design, or technique once in awhile, but clean and simple are fun. So, without further adieu, I have THREE, yes THREE cards to show you tonight!


The challenge was to use three colors...........Yellow, Orange, Turquoise, in a clean and simple pattern. Well, could I have gotten any simpler than the one above? Maybe, but who cares. I ran my Whisper white card stock through my cuttlebug with my Swiss Dots embossing folder, stamped a quick sentiment (from Pocket Silhouettes), and punched 3 flowers with my Stampin Up Trio Flower Punch out of Yoyo Yellow, Only Orange, and Tempting Turquoise. This will be one of the very few times that you see me use Only Orange, not my favorite. However, I did use it in the bottom two cards as well. Like I said, I was just playing along with the challenge. I think that anyone of these three would be great done as monochromatic cards!

This card was made with Stampin Up's 5-Petal Flower punch, Trio Flower Punch, and some Hero Arts Sticky Gems.


This final card was made with Stampin Up's Full Heart Punch, some DCWV buttons, and some tone on tone stamping with a stamp from Pocket Silhouettes stamp set from Stampin Up.


Until next time, blessings to all. Lisa


Monday, July 13, 2009

Quick and Simple Cards

Hello. It feels great to be back to blogging after having a little time off. I had mentioned on my last post that I was preparing some really quick and simple cards to show you for my next post. I decided to use Stampin Up's "Kind and Caring Thoughts" hostess stamp set again for these quick cards. Here is what I came up with:

You can't get any more simple than this. I saw this over on Splitcoast stampers and had to case it, to share with you. Two stamps on a single layer card, easy peasy. It was so easy, that I had time to come up with another easy card of my own design with another stamp from the same stamp set. Here is that one:


All supplies used are Stampin Up. Until next time..................Blessings, Lisa

Saturday, May 9, 2009

Clean and Simple Card Challenge

is what inspired me to stamp yesterday. The ladies over at Splitcoast Stampers, decided to make the clean and simple challenge this past week a particular card sketch. The link above will take you right to their forum if you would like to see some more samples of it. Their theory is that a handmade greeting card does not need to be overly detailed and embellished to be pretty. Of course detailed cards are pretty, but so are the simple ones. So, here is a couple of cards that express my take on their clean and simple sketch for this past week:


I used Stampin Up's Whisper White card stock for the card base. The butterflies are actually some butterfly shaped foamies, which are foam shapes with adhesive on both sides. So, all I had to do was to fut them on my xacto knife, take off one side of the adhesive and dip them into some glitter. I used Stampin Up's Fine Cosmo glitter stack on these. I got these foam shapes at a stamp and paper store in Dayton, Ohio called Marco's Paper. Click on their name as I added a link to it, and I am sure if you call them and ask they will more than likely have some. They come in several different shapes, and are approximately $2.50 per sheet. I think you can order them over the phone or on the Marco's web site. The punched circles are from Pretty in Pink, and Bashful Blue card stock, and the sentiment is from SU stamp set "Warmest Regards". The ribbon is from the Michael's dollar bins, and that about sums that one up. The next one is using the same sketch, but it is using my charity "Lydia Fiedler" original stamp "Maddie" the cat. I love animals and was so glad that I was able to help out that I have gotten overly hooked on this stamp. I hope I haven't worn out it's welcome with you viewers. If you would like to buy a stamp to help an animal shelter, page down to one of my older posts for a link. Rumor has it, that they are also going to be creating doggie stamps for the same benefit in the future. I can't wait to see what the creative designers come up with. So, here is another card, I like to call "Peeking Maddie Cat":


So, what do you think? I could not help going monochromatic purple on this one! By now, I assume you have realized that purple is my favorite color, and kitties are one of my many favorites in the animal kingdom (along with a thousand other species that exist).

The circle in the far right bottom row is Maddie's tail, I guess that she got tired of being stamped by me, and started to run off. Haha. Kidding. I just thought it would be fun to put her tail in one of the circles. Oh, by the way, is this not one of the funnest card sketches you have ever seen? Yeah to the ladies over on Splitcoast, because there are so many stamps that we all could use with this sketch. Think how fast it would be to make Christmas cards with this sketch. I will hold that thought and post some Christmas cards done with this sketch when the season arrives.

Anyways, The card base is Stampin Up's Almost Amethyst, and the Maddies are stamped on Whisper white then punched out with a circle punch (almost any size will work). The ink colors are: Elegant Eggplant, Lovely Lilac, Orchid Opulence, Lavender Lace, and Almost Amethyst. Once again, the sentiment is from Retired SU's "Warmest Regards". As always, if you have any questions, leave me a comment or send me an email. Enjoy your Saturday.

Blessings, Lisa