.jpg)
 What I did was to cut out the part of the image that was going to be effected by the die-cut with my x-acto knife. Yes, I know, tedious, but I studied Architecture in college so I am used to and enjoy detailed and tedious work.
 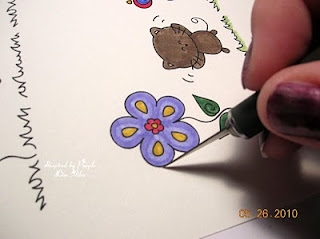 Notice in this next photo, the flower petals are cut and can be lifted up.
So, in the next photo below, I laid my die-cut onto the image where I wanted it, taped it down with blue painters tape (removes easily and doesn't damage). This way the die-cut doesn't shift while moving through the die-cut machine. Then simply lift the cut portions of the image over the edge of the die-cut. In this case it doesn't overlap by very much, but there are times, when a digi or stamped image can overlap by more.
Well, as you remember from the finished project photo above, all of the flower petals were cut and curled up. Well, I got on a roll and thought it would be fun to trim around all of the petals and curl them up just a bit. The center of the flower is anchored down with a small piece of Extra Tacky tape (find it at Stampin Up or Michael's), as cutting all of the petals left it hanging by a thread of card stock. That is all on the mini tutorial, if you have any questions, please feel free to email me from the link on my sidebar.
Now, as some of you may recall, on the first blog hop I chose to make a couple of cards with two animals from the "Animal's Collection". I made two cards, one with Michu the cat, and one with the Bunny, and if you browse my older soft pencil posts, you will see one made with Ratiny. Today, I decided to make one with the Giraffe. I thought it would make a great birthday card for a 2-4 year old child, they always seem to like zoo animals. So, here is what I came up with:
I really need to finish up this post as it is getting late, so if you have any questions about this second card as well, please feel free to email me.
Next on the blog hop is Soft Pencil DT Coordinator Kerry, who's blog can be found right here.
Until Next time.................. Blessings, Lisa